A Developer’s Guide to Mastering Branches in Git
At its core, a Git branch is just a lightweight, movable pointer to a specific commit. Think of it as creating a parallel universe for your code. It lets you build new features, crush bugs, or just experiment without messing up the stable, main version of your project.
What Are Git Branches and Why Do They Matter?

Imagine your project’s main code as the strong, stable trunk of a tree. This trunk, usually called the main or master branch, is the official, production-ready version of your software. It’s the source of truth. You wouldn’t want to start carving into the main trunk to test an idea—one wrong move could jeopardize the whole tree.
This is where the real power of branches in Git comes in. Instead of hacking away at the trunk, you grow a new branch from it. This new branch starts as an exact copy of your main codebase at that specific moment.
From there, you’re in a completely isolated sandbox. You can add new code, tear out old files, and make huge changes, all without touching the main branch. This isolation is the secret sauce that makes modern, collaborative software development not just possible, but efficient.
The Power of Isolated Development
Git branching is the feature that lets developers diverge from the main line of development. Since its creation in 2005, this capability has made Git the backbone of software development, allowing teams to work in parallel without stepping on each other’s toes. If you want to dive deeper into how developers use Git in their daily workflows, check out these insights on ThinkPalm.com.
This ability to work in isolated streams gives you some serious advantages:
- Safety and Stability: The main branch stays clean, stable, and ready for deployment at a moment’s notice. All the messy, in-progress work is safely contained in its own feature branch.
- Concurrent Workflows: Multiple developers can tackle different features at the same time. One person building a new user profile page won’t cause chaos for someone else fixing a critical payment bug.
- Clear Organization: Every task—a new feature, a quick bug fix, a wild experiment—gets its own dedicated branch. This keeps your project history clean, logical, and easy to follow.
To help you get a quick handle on these ideas, here’s a breakdown of the core concepts you’ll encounter when working with branches.
Core Branching Concepts at a Glance
This table summarizes the fundamental terms and their purpose, providing a quick reference for both new and experienced developers.
| Concept | Purpose | Analogy |
|---|---|---|
| Branch | An independent line of development. | A copy of a document where you can make edits without changing the original. |
| Commit | A snapshot of your code at a specific point in time. | Saving your progress in a video game at a checkpoint. |
| HEAD | A pointer to the current branch you are working on. | The “You Are Here” marker on a mall map. |
| Main/Master | The default, primary branch representing the stable version. | The finished, published version of a book. |
| Feature Branch | A temporary branch for developing a specific new feature. | A rough draft of a new chapter before it’s added to the book. |
Understanding these pieces is the first step. Once you’re comfortable with them, the entire Git workflow starts to click into place.
At its core, a branch is just a lightweight, movable pointer. Creating a new one is incredibly fast and cheap, which encourages developers to use them for even the smallest changes. This is a significant departure from older version control systems where branching was a complex and resource-intensive operation.
Once the work on a branch is complete and tested, you can merge it back into the main trunk, integrating the new code into the official project. This cycle of branching, developing, and merging is the central workflow for nearly every modern software team. Mastering it is the key to shipping code efficiently and without unnecessary risk.
Essential Commands for Managing Git Branches
Knowing what branches in Git are is one thing. Actually using them is where the rubber meets the road. This is where you move from theory to practice, using a handful of core commands to create, navigate, and share your work. These commands are the bedrock of your day-to-day Git workflow.
Mastering them isn’t about memorizing syntax. It’s about building muscle memory so your development process feels fluid and natural. These are the tools that let you safely build features, squash bugs, and work with your team without ever putting the main codebase at risk.
Creating and Switching Branches
Your first move on any new task should be to create an isolated workspace—a new branch. It’s a great habit to name branches descriptively so their purpose is obvious at a glance, like feature/user-login or fix/payment-bug.
To spin up a new branch, you just use the git branch command followed by whatever you want to call it:
git branch feature/add-user-profileNow, this command only creates the branch; it doesn’t automatically move you onto it. To start working there, you need to “check out” or switch to it. The modern, recommended command for this is git switch.
git switch feature/add-user-profileYour terminal will confirm the move with a message like: Switched to a new branch 'feature/add-user-profile'. From this point on, any commits you make are recorded on this new timeline, leaving your main branch completely untouched.
Pro Tip: Creating and then immediately switching to a branch is such a common pattern that there’s a shortcut. You can do both in one command with the -c flag: git switch -c fix/header-css. This creates the fix/header-css branch and instantly moves you to it.
This simple shortcut will save you thousands of keystrokes over the lifetime of a project.
Viewing Your Branch Landscape
As your project grows, you’ll inevitably have multiple branches floating around on your local machine. It’s easy to lose track. Running git branch without any arguments gives you a clean list of all the branches that exist locally.
git branchThe output will look something like this, with a little asterisk marking the branch you’re currently on:
main* feature/add-user-profile fix/payment-bugThis local view is critical, but development is usually a team sport. To get the full picture, including branches that live on the remote server (like GitHub), you can use the -a (all) flag.
git branch -aThis command shows your local branches plus all the remote-tracking branches, which are usually prefixed with remotes/origin/. It gives you a complete overview of every active line of development.
Sharing Your Work with the World
Okay, you’ve made a few commits on your local branch. Now it’s time to share your progress. A branch you create locally exists only on your machine until you explicitly push it to the remote repository. This is a crucial step for collaboration and for backing up your work.
The command for this is git push. The very first time you push a new branch, you need to tell Git where to send it and set it up to track the remote branch for future pushes.
git push -u origin feature/add-user-profileLet’s break that down:
git push: The main command to send your local changes to a remote.-u: This is shorthand for--set-upstream. It’s a powerful flag that links your local branch to the new remote one.origin: The default name Git gives to your remote repository.feature/add-user-profile: The name of the branch you’re pushing.
Setting the upstream connection is a one-time thing. After you do this, you can just run a simple git push from that branch, and Git will know exactly where to send your future commits.
It’s no surprise that around 65% of developers prefer using the command line for Git operations—it gives you this kind of direct control. This hands-on approach is often paired with automation, where 70% of pull requests trigger automated tests to ensure branch quality. You can dig into more Git-based development statistics and practices at hutte.io.
Integrating Your Work with Merging and Rebasing
Once you’ve carefully built a new feature or squashed a bug on its own branch, the last step is to bring that code back into the main project. This is a critical moment. In Git, you have two primary ways to do this: merging and rebasing.
Each method has its own philosophy about how to combine project histories. The right one for you often comes down to your team’s workflow and what you value most in your project’s log. Let’s break down both so you can make the right call.
The Merge Method: Weaving Histories Together
The most common way to integrate branches is with git merge. Think of your main branch as one thread of yarn and your feature/user-login branch as another. Merging is like tying these two threads together with a brand-new knot.
That “knot” is a special merge commit. It’s unique because it has two parent commits—one from main and one from your feature branch—creating an explicit record that two different lines of work have been combined.
To pull off a merge, you just switch to the branch you want to bring the changes into and then run the command:
- Switch to the main branch:
git switch main - Merge your feature branch:
git merge feature/user-login
This approach keeps the history of your feature branch completely intact. Anyone can look at the project log and see exactly when the feature was developed and when it was integrated. While this transparency is a huge plus, it can sometimes make the history graph look a bit tangled and non-linear.
The biggest win for merging is traceability. That dedicated merge commit is like a signpost in your project’s history that says, “Right here is where the user login feature officially joined the main codebase.” For debugging or code reviews, that kind of clarity is priceless.
Teams that value a complete, auditable history often prefer this method. The merge commit itself becomes an important part of the project’s story.
The Rebase Method: Rewriting for a Cleaner Story
Rebasing takes a totally different path. Instead of tying two histories together, it rewrites your feature branch’s history to make it look like you started your work from the very latest version of the main branch.
Picture your feature branch as a small plant that sprouted from an older point on the main trunk of a tree. Rebasing carefully lifts your branch and replants it at the very tip of that trunk. Now, it looks like your work was always based on the most recent code.
Here’s how you do it:
- Switch to your feature branch:
git switch feature/user-login - Rebase onto the main branch:
git rebase main
After the rebase, your feature branch’s commits will line up one after another, right after the latest commit on main. The result is a perfectly straight, linear history that’s often much easier to follow. From there, you can switch back to main and perform a “fast-forward” merge, which just moves the main pointer forward to include your new commits without creating a merge commit.
Merge vs Rebase: A Practical Comparison
The “merge vs. rebase” debate is a classic one on development teams. The truth is, neither is universally better; it all depends on what you want your project history to look like. Here’s a quick comparison to help you decide.
| Attribute | Git Merge | Git Rebase |
|---|---|---|
| History | Preserves the exact, non-linear history of all branches. | Creates a clean, linear history by rewriting commits. |
| Traceability | Excellent. The merge commit clearly marks the integration point. | Can be less clear, as the original branching point is lost. |
| Complexity | Simple to use and understand; less chance of mistakes. | More advanced; can be dangerous if used on shared branches. |
| Best For | Teams that value a complete and auditable history. | Teams that prioritize a simple, readable project log. |
If you take away just one thing, let it be the golden rule of rebasing: never rebase a branch that other developers are using. Rewriting the history of a shared branch will cause absolute chaos for your teammates. Rebase is fantastic for cleaning up your own local, private branches before you share them with anyone else.
When you are ready to integrate your changes into the main project, understanding how code review and pull request systems work is key to making the whole process smooth and collaborative.
Proven Git Branching Strategies for Teams
Knowing the commands to create and merge branches in Git is just the start. To really get work done, your team needs a shared playbook—a branching strategy. This gives you a predictable, consistent structure for building new features, prepping releases, and smashing bugs.
Without a solid workflow, your repo can quickly spiral into a tangled mess of confusing branch names and crisscrossing development lines. A good strategy cuts through the chaos, making it dead simple for anyone to understand the state of the project at a glance. It gets the whole team on the same page, cutting down on friction and speeding everything up.
The Feature Branch Workflow
By far the most common and straightforward strategy out there is the Feature Branch Workflow. The core idea is simple: all new work happens on its own dedicated branch. The main branch is sacred—it’s always kept in a stable, production-ready state.
This model is incredibly flexible, especially if your team is already doing continuous integration and deployment.
The process just makes sense:
- Cut a New Branch: Before you start on a new feature or fix, you create a new branch from the latest version of
main. Give it a descriptive name, likefeature/user-authentication. - Develop in Isolation: All your commits for that specific task go onto this new branch. This is huge because it keeps the
mainbranch clean and protected from your half-finished, potentially buggy code. - Open a Pull Request: Once the feature is ready for primetime, you open a pull request (PR). This is where your team can review the changes, leave comments, and give the green light.
- Merge and Deploy: After the code is approved, the feature branch gets merged back into
main. From there, it can be deployed to production.
There’s a reason this workflow is so popular. Roughly 60% of development teams have adopted some form of a feature-branch model. Its simplicity makes it a perfect fit for teams that need to move fast. You can dive deeper into the numbers with these modern Git-based development statistics from hutte.io.
The golden rule of the Feature Branch Workflow is that the main branch should always be deployable. This discipline means you can push out a new version or an emergency hotfix at a moment’s notice, without worrying that you’re shipping someone’s broken code.
This model is the perfect starting point for almost any project, whether you’re a solo founder or a small, agile team.
The GitFlow Workflow
For projects with more complex release schedules—think products with scheduled version updates—a more structured strategy like GitFlow often fits better. GitFlow introduces several types of branches, each with a specific, long-running job. It provides a rock-solid framework for managing bigger, more complicated projects.
GitFlow is built around two primary branches that stick around forever:
main: This branch is the official release history. It’s tagged with version numbers (like v1.0, v1.1) and should only ever contain squeaky-clean, production-ready code.develop: This is the main integration branch for new features. All your feature branches are created fromdevelopand, once finished, are merged back into it.
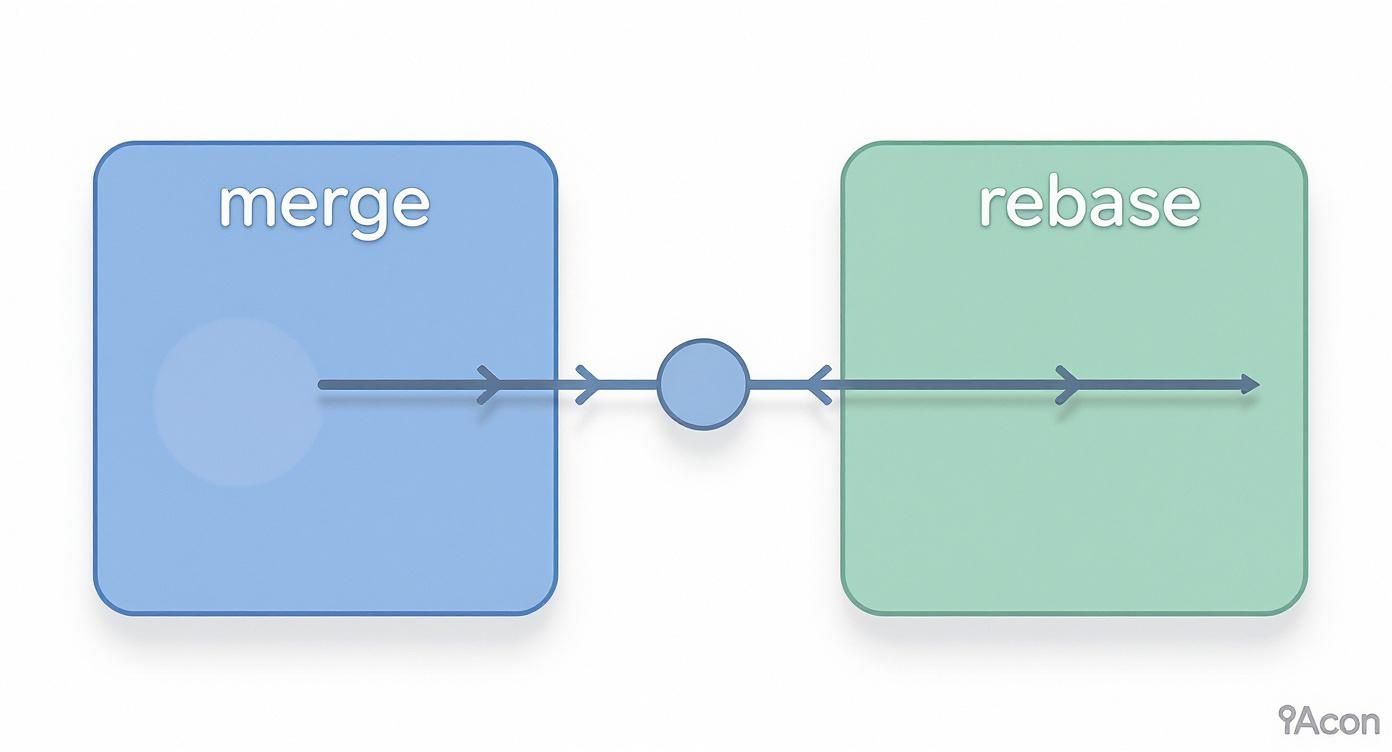
This diagram shows the two key ways to combine branches—merging and rebasing—which are central to any workflow. As you can see, merging is a non-destructive act that joins two histories together, while rebasing actually rewrites commit history to create a perfectly straight, linear timeline.
On top of these main branches, GitFlow uses a few temporary, supporting branches:
- Feature branches: These work just like in the Feature Branch Workflow, but with one key difference: they branch off of
develop, notmain. - Release branches: When you’re getting ready to ship a new release, you create a release branch from
develop. This is where you’ll do final bug fixes, bump version numbers, and prep documentation. - Hotfix branches: When a critical bug pops up in production, you create a hotfix branch directly from
main. Once the fix is ready, it gets merged back into bothmain(to patch production) anddevelop(to ensure the fix is in future releases).
Choosing the Right Strategy
So, which one should you pick? It really boils down to your team’s size, your project’s complexity, and how you release software.
- Choose the Feature Branch Workflow if: You practice continuous deployment, your team is small, or you just prefer a simpler, more flexible model. It’s the go-to for most web apps and SaaS products that are updated all the time.
- Choose GitFlow if: You manage a project with scheduled, versioned releases. It’s a lifesaver in environments where you need to support multiple versions of a product in production at the same time.
Ultimately, the best strategy is the one your team actually understands and uses consistently. A well-chosen workflow can dramatically improve your team’s productivity and is a core part of effective release management and deployment tooling.
Best Practices for Clean Branch Management

Knowing the commands for branches in Git is one thing. Building clean, disciplined habits is what truly separates the pros from the amateurs. A well-kept repository is just a joy to work in, making it dead simple for anyone on the team to trace the project’s history and see what’s going on.
It doesn’t take much—just a few simple routines. Stick with them, and you’ll cut down on confusion, dodge those painful merge conflicts, and make collaboration a whole lot smoother for everyone.
Adopt a Naming Convention
Clarity starts with how you name your branches. Names like my-fix or new-stuff are useless because they tell you nothing. Instead, you need a structured format that communicates a branch’s purpose at a glance.
A simple and wildly effective pattern is to use prefixes based on the type of work. This immediately signals what the branch is for before anyone even looks at the code.
feature/user-auth: For when you’re building something new.fix/login-bug: Perfect for squashing bugs.chore/update-dependencies: For routine maintenance that doesn’t add new functionality.hotfix/critical-security-patch: Reserved for those urgent, all-hands-on-deck production fixes.
This small change makes your branch list instantly scannable and brings a welcome sense of order to the whole repository.
A clean repository is a direct reflection of a disciplined team. Naming conventions are the first and easiest step toward establishing a professional workflow that scales as your team grows.
Keep Branches Small and Focused
This is a big one: keep your branches small and short-lived. A single branch should represent a single, logical unit of work. Fight the temptation to cram a bunch of unrelated features or fixes into one massive branch.
Why? Because those large, long-running branches are where nasty, time-sucking merge conflicts are born.
By keeping your branches small, you ensure they can be reviewed, merged, and deployed quickly. This philosophy fits perfectly with modern development and is a cornerstone of effective DevOps automation. For a deeper look, check out this guide on what DevOps automation is and how it speeds up software delivery.
This approach doesn’t just reduce merge risk; it also leads to much better code reviews. It’s far easier for a teammate to give meaningful feedback on a small, digestible set of changes.
Clean Up After Merging
Finally, be a good citizen and tidy up your workspace. Delete branches after they’ve been successfully merged. Old branches lingering around, both on your local machine and on the remote server, just create clutter. They make it hard to see what work is actually in progress.
Once a branch’s code has been merged into main or develop, it has served its purpose. Deleting it is simple housekeeping that prevents your repo from turning into a graveyard of dead ends. This discipline keeps the focus on active development and makes your repository a much cleaner, more efficient place for everyone.
Common Questions About Git Branches
As you get your hands dirty with Git branches, you’ll start running into the same questions that trip up every developer. These aren’t abstract problems; they’re the practical hurdles you hit day-to-day. Nailing down clear answers to these common sticking points is how you build real confidence in your workflow.
Think of this section as your go-to guide for those “wait, how do I do that again?” moments. We’ll tackle the most frequent questions head-on, so you can solve them and get back to building.
What’s the Difference Between a Local Branch and a Remote Branch?
A local branch is your private workspace. It exists only on your machine. This is your sandbox—a place to experiment, write new code, and even make a mess without affecting anyone else on the team. Nobody sees your work here until you’re ready to share it.
A remote branch is the team’s copy, living on a shared server like GitHub or GitLab. It’s the official, public record for that specific line of development.
- When you run
git push, you’re sending the commits from your local branch up to the server to update the corresponding remote branch for everyone else to see. - When you run
git pullorgit fetch, you’re grabbing the latest changes from the remote branch and bringing them down to your local machine.
The easiest way to think about it is this: your local branch is a personal draft, and the remote branch is the version you publish for the team.
How Do I Fix a Merge Conflict?
A merge conflict is Git’s way of throwing its hands up and saying, “I don’t know how to combine these changes.” It happens when you and another developer have edited the exact same lines in the same file on different branches. Git can’t just guess which version is correct, so it pauses the merge and asks you to step in.
You’ll know it happened because Git will mark the conflicted file with a bunch of <<<<<<<, =======, and >>>>>>> markers, showing you both sets of competing changes.
Here’s how you fix it:
- Open the file in your code editor. You’ll see the conflicting sections clearly marked.
- Decide what the final code should look like. You might keep your changes, their changes, or a mix of both. Manually edit the file until it’s correct, and be sure to delete all the
<<<,===, and>>>markers. - Save the file, then stage it by running
git add <file-name>. - Finish the merge by running
git commit.
You’re essentially just telling Git, “Hey, I sorted out the disagreement. Here’s the correct version. You can proceed now.”
When Should I Delete a Branch After Merging It?
Immediately. The moment your feature branch is successfully merged, its job is done.
Deleting a branch doesn’t erase any history. All of its commits are now safely woven into the history of your main branch. Keeping old, merged branches around is just clutter that makes it harder to see what work is actually in progress.
It’s a simple housekeeping task that keeps your repository tidy and professional. A clean repo is an easy-to-navigate repo.
You can clean up both locally and remotely with two quick commands:
- For your local machine:
git branch -d <branch-name> - For the remote server:
git push origin --delete <branch-name>
Making this a habit is one of the small things that separates a clean, well-maintained project from a messy one.
Building a SaaS requires more than just clean code—it demands a solid, secure foundation. saasbrella gives you a production-ready stack with git-push deployments, so you can stop wrestling with DevOps and start shipping features your users will love. https://www.saasbrella.co